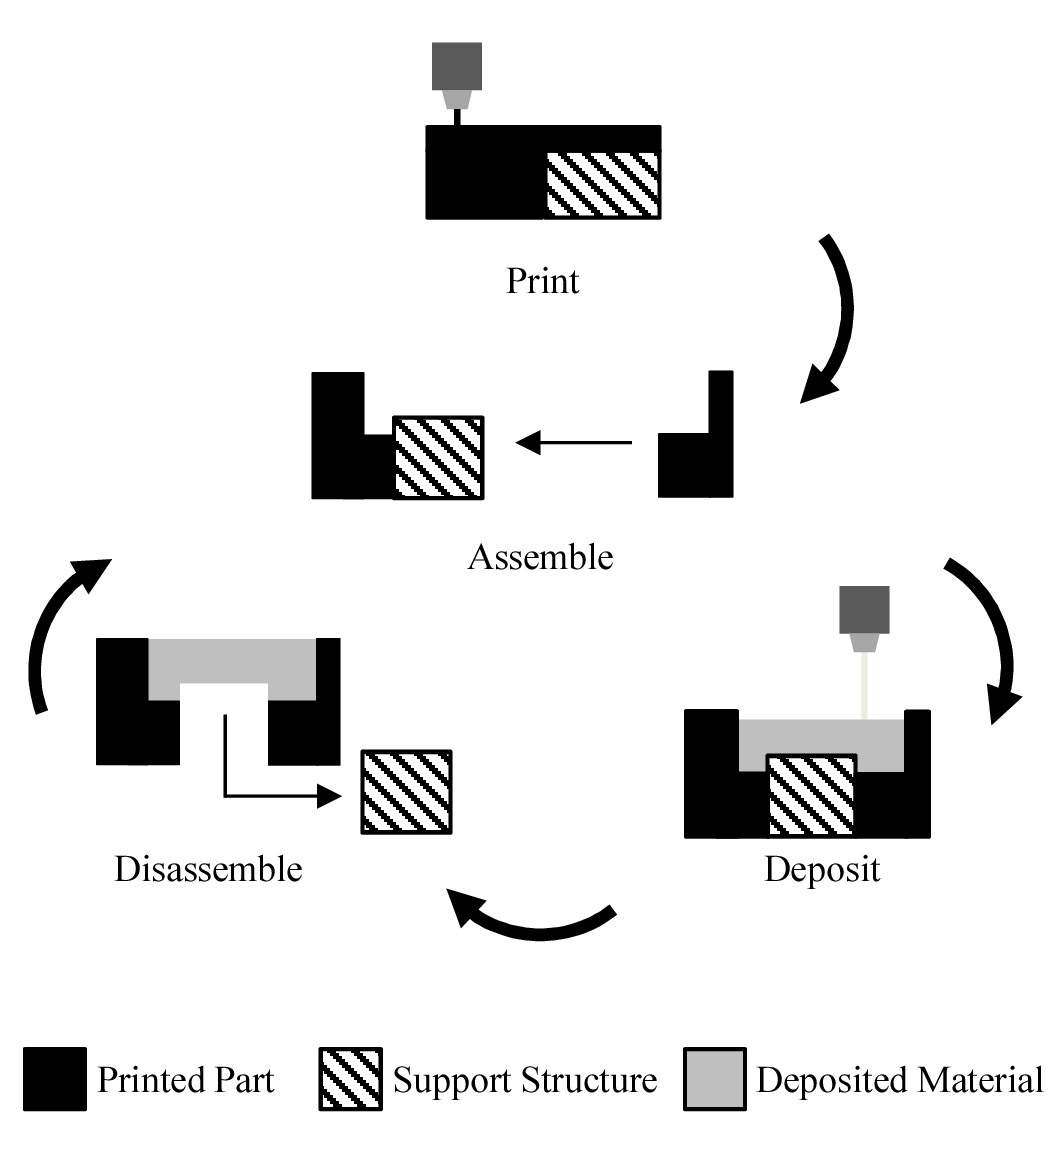
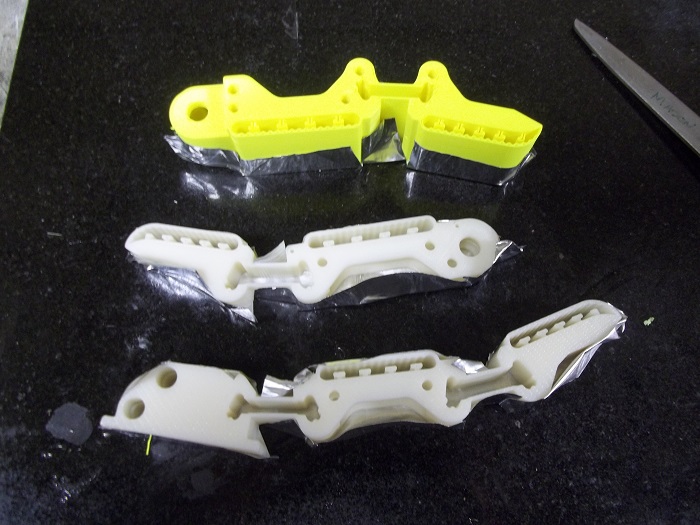
HDM combines additive manufacturing (AM) processes such as FDM with material deposition and embedded components to produce multi-material parts and systems for robotics, mechatronics, and articulated mechanism applications. Additive manufacturing techniques are used to print both permanent components and sacrificial molds for deposited resins and inserted parts. Using cast flexure joints and pads in place of traditional fasteners and assembly processes improves the robustness of the produced parts and the rate at which designs iterations can be made.
The process can be summarized by the following steps:
Example w/ Thin Wall Molds (Video)
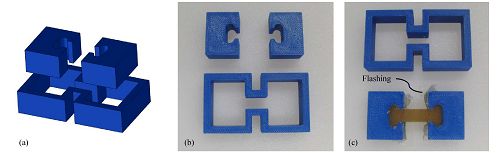
Example w/ Multi-Part Molds (Video)
Mold parts can be printed with commercially available, desktop, FDM 3D-printers. Parts for the OpenHand project were printed on Stratasys uPrint and Fortus 250mc machines. Molds can be created a number of ways:
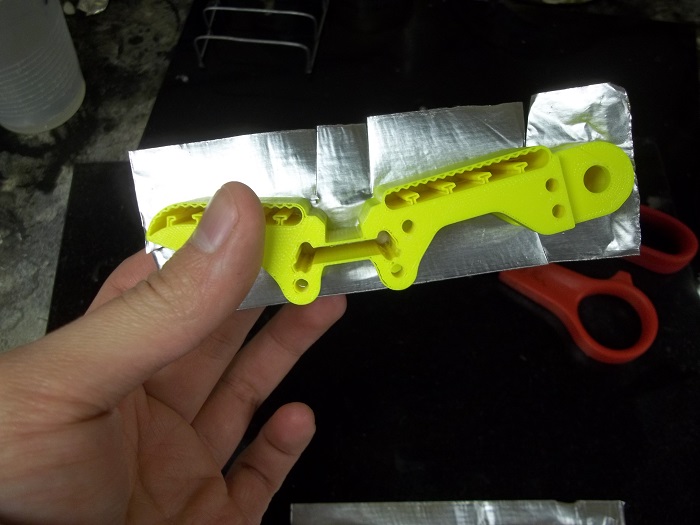
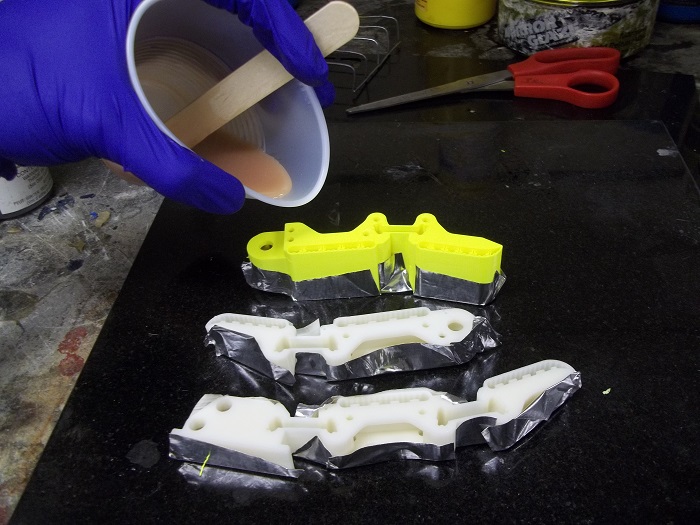
Molds need to be sealed properly prior to resin deposition. The easiest way we've found to do this is metal foil tape, commonly used for HVAC. This tape has good adhesion and durability but can also be easily removed after the resins cure. We've also had success with painter's scotch tape in the past, though adhesion has been an issue.
Depending on the viscosity of the urethanes you use, leakage is to be expected, so it's in your best interest to properly seal the bottom of the molds as much as possible. The multi-part molds use a snap-together frame to minimize leaking.


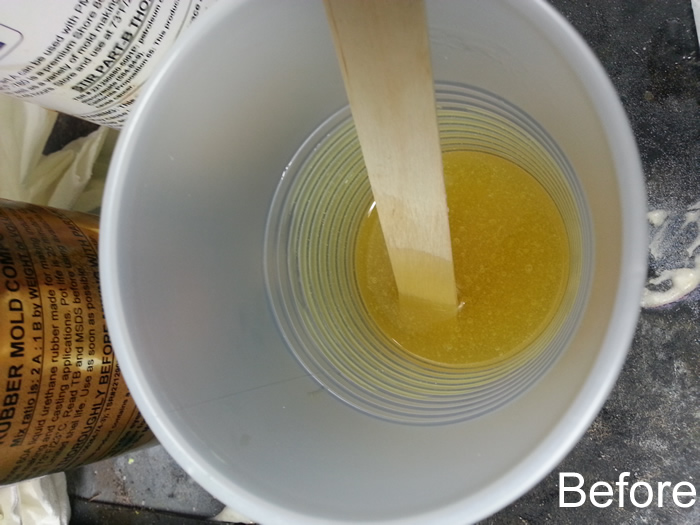
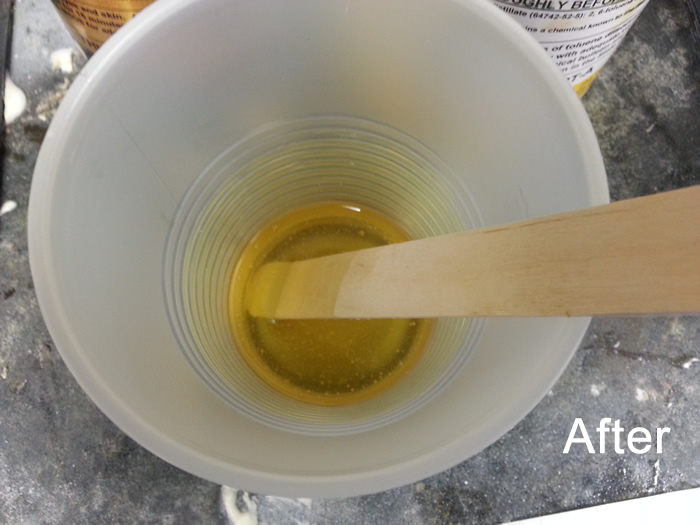
We recommend a precision balance scale, with resolution of at least 0.1g for accurate measurement and mixing of urethanes. The Yale OpenHand Project generally uses two-part urethanes: PMC-780 for flexure joints, and Vytaflex 30 for pads. We advise that you add the urethane parts to the same container. Do not measure the urethanes separately and then pour both into a common mixing container. The high viscosity of these urethanes can result in an error in that case.
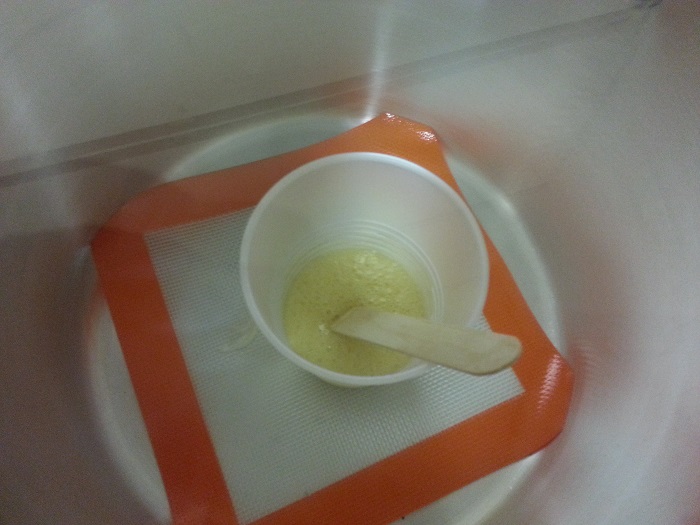
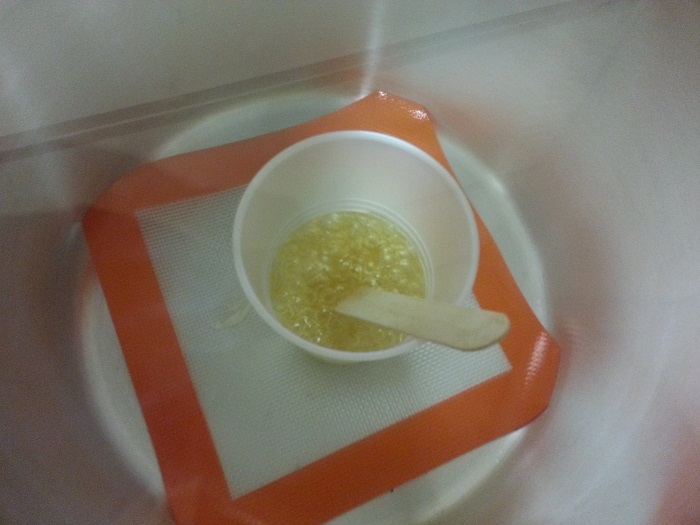
As recommended by the manufacturer, the urethanes should be degassed in a vacuum chamber after mixing, whenever possible. Degassing should take only a few minutes. You should see a large rise followed by a sudden drop in material level. If you are at a university, degassing chambers should be available through your art department or any group that works with cast molds.
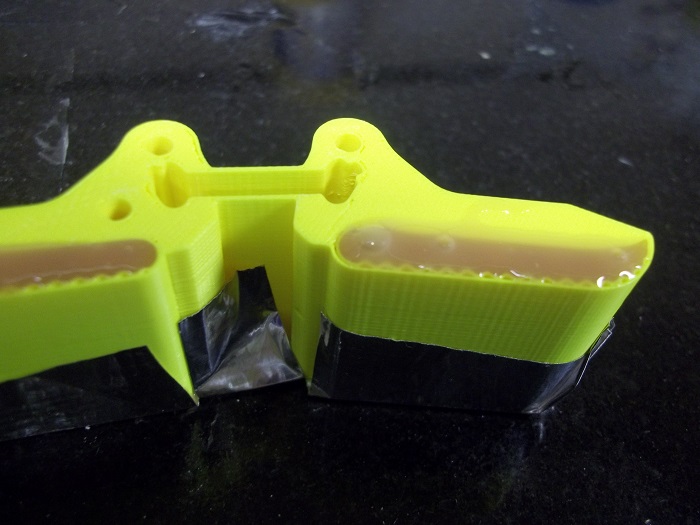
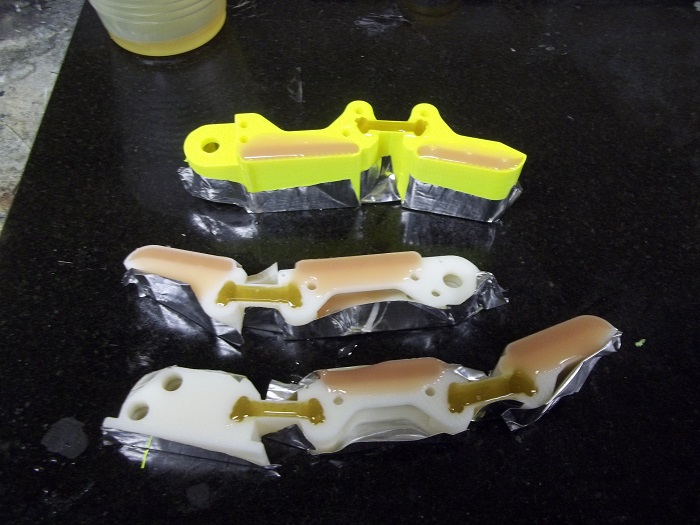
Pour resins slowly and with as thin of a stream as possible. This mitigates bubble formation. Do not pour haphazardly and so quickly such that you trap bubbles under the poured urethane. If this is your first time pouring urethanes, you will probably make a mess.
You'll want to pour more than necessary, such that convex meniscus forms. Your urethanes will probably leak out of the mold before it fully cures. Excess urethane material can be easily cut away during post-processing. Be wary of the pot life and working time of your urethanes to ensure that you're not pouring the urethanes too slowly.
After pouring, it's likely that there will be visible bubbles either on the surface or just below the surface. You can take a needle, another tool with a sharp point, or a can of compressed air to burst them.
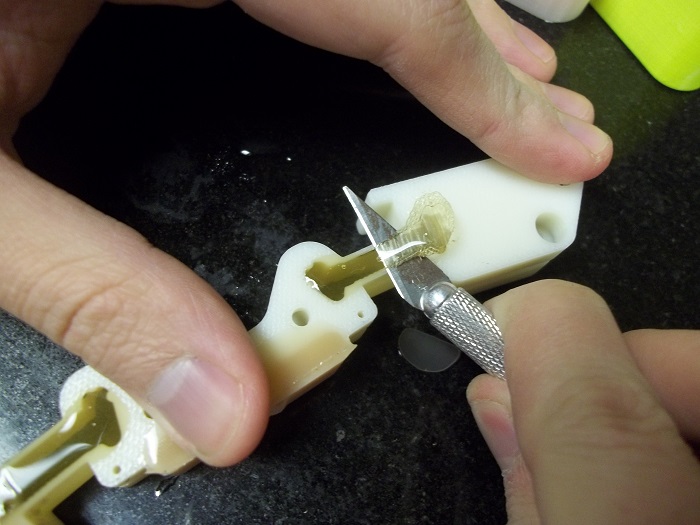
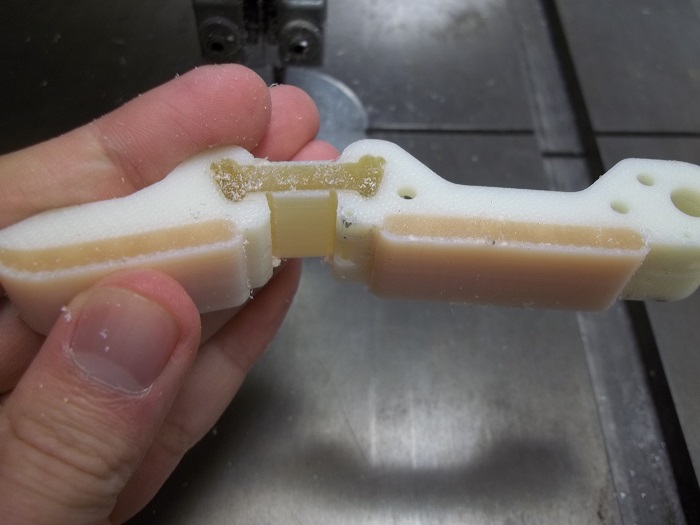
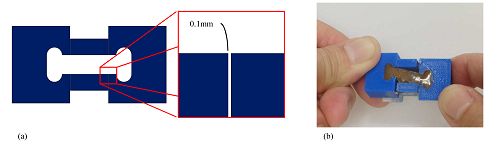
Excess cured urethanes can be removed with a sharp blade. We prefer scalpel blades or razor blades versus serrated blades. The urethane is soft and compliant, so a sander or a file may not work very well.
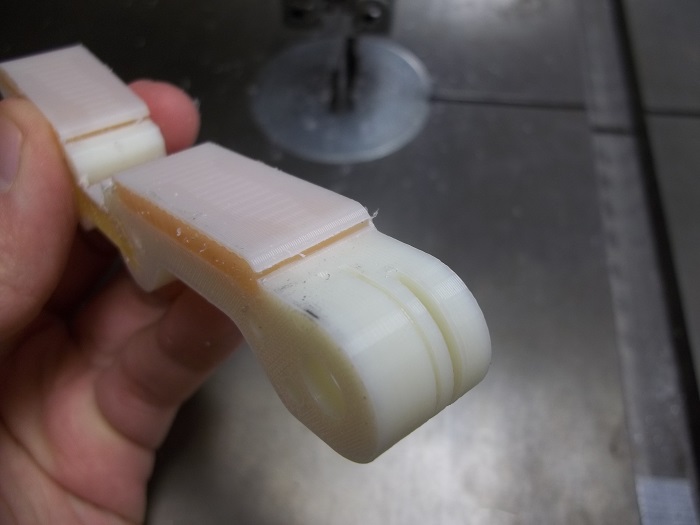
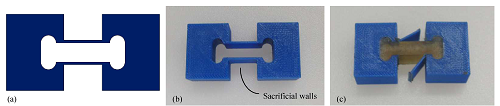
For thin-walled molds, the sacrificial walls are most easily removed on a bandsaw. You don't have to cut all the way through the wall. With just a partial cut, you can snap the walls apart with a flat-head screw driver or just by flexing the joints for cast flexures. Excess ABS or jagged cuts can be cleaned with a blade or small file.